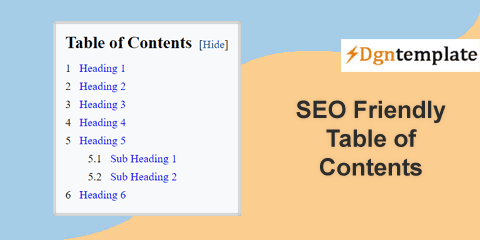
Wikipedia is famous for its feature called the table of contents. You might have seen on Wikipedia the Table of Contents menu at the right or left a corner of the article.
Table of Contents
Table of Contents or TOC is just simple content, which is lists and are usually found on a post or page at the beginning of an article.
It usually includes the heading of your post headers and may also include a second level or section titles and jump directly to the selected heading section.
The purpose of making a table of contents in a blog article
The purpose of providing a table of contents in a post is to make it easier for readers to explore and understand what's the content in the blog.When a reader wants to get information but does not want to read the entire article that we made but only wants to get certain information, the table of contents helps to reach a specific point/section so that they don't have to scroll down.
Thus it can increase the attraction of readers to visit again on our blog, because of the ease of information that is presented in each post/article that we make.
In addition to making it easier for readers to find information, blogs that provide a table of contents in each post written will be most preferred by search engines like Google, so they review our posts/articles more appropriately.
Benefits of Table of Contents on your Blog posts
1. Tables of contents allow you to write lengthy articles and your visitors can easily navigate to the particular point or headings without scrolling down.2. It can reduce your high bounce rates by keeping your readers engaged.
3. As it displays jump to section link, web crawlers can easily crawl your contents and that improves your search engine ranking.
How to Add Table of Contents (TOC) Inside a Blogger Post
Making a table of contents in a website article is very easy, but it seems that there are still many people who do not know how to make it. The code of this TOC is very light because it's only made using CSS and HTML. It doesn't need Javascript so it doesn't reduce webpage loading. So in this post, I will discuss a simple and easiest way to make a table of content. Ok, let's practice it.Step-1 Add CSS code
To give a professional look, first, we have to add the following CSS code just above the </style> OR ]]></b:skin> tag./* Table of Contents by igniel {dgntemplate} */
.toc {background-color:#f8f9fa; border:2px solid #ddd; padding:10px 13px; display:table; line-height:1.6em;}
.toc h2 {display:inline-block; margin:0 10px 10px 0}
.toc a {text-decoration:none}
.toc a:hover {text-decoration:underline}
.toc ul {list-style-type:none; list-style-image:none; margin:0px; padding:0px; text-align:left}
.toc ul li {list-style-type:none;}
.toc ul li a {margin-left:.5em}
.toc ul li ul {margin-left:2em}
.toctogglelabel {cursor:pointer; color:#0645ad}
:not(:checked) > .toctoggle {display:inline !important; position:absolute; opacity:0}
:not(:checked) > .toctogglespan:before {content:'['}
.toctoggle:not(:checked) + .toctitle .toctogglelabel:after {content:'Hide';display: inline}
.toctoggle:checked + .toctitle .toctogglelabel:after {content:'Show'}
:not(:checked) > .toctogglespan:after {content:']'}
.toctoggle:checked ~ ul{display:none}
:target::before {content:''; display:block; height:0px; margin-top:0px; visibility:hidden}Note: The last row of the CSS code that is :target::before. If you use the sticky header/navigation menu, change its height and margin-top match the size of the mounted header/navigation.
Step-2 Add Html code
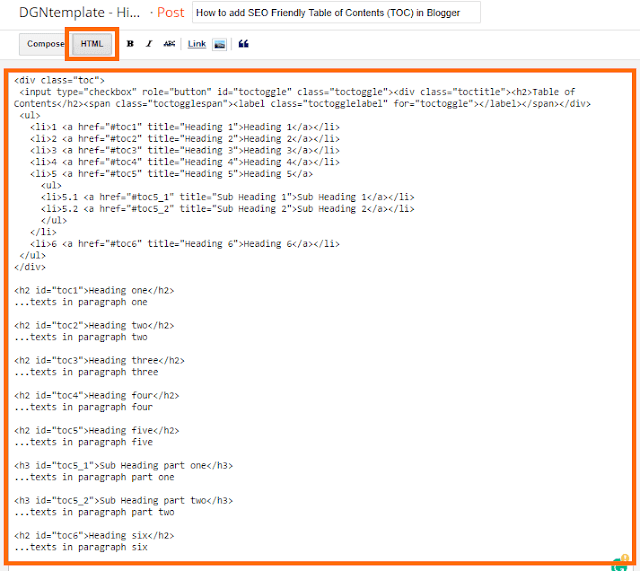
Now Add the main part TOC, which is to make a table of contents in the Blogger post. Now go to Blogger dashboard >> Posts >> New post and write a post. When creating a new post, make sure to choose the mode HTML, NOT Compose. Then copy the following Html code and paste it in the initial paragraph.<div class="toc">
<input type="checkbox" role="button" id="toctoggle" class="toctoggle"><div class="toctitle"><h2>Daftar isi</h2><span class="toctogglespan"><label class="toctogglelabel" for="toctoggle"></label></span></div>
<ul>
<li>1 <a href="#toc1" title="Heading one">Heading one</a></li>
<li>2 <a href="#toc2" title="Heading two">Heading two</a></li>
<li>3 <a href="#toc3" title="Heading three">Heading three</a></li>
<li>4 <a href="#toc4" title="Heading four">Heading four</a></li>
<li>5 <a href="#toc5" title="Heading five">Heading five</a>
<ul>
<li>5.1 <a href="#toc5_1" title="Sub Heading part one">Sub Heading part one</a></li>
<li>5.2 <a href="#toc5_2" title="Sub Heading part two">Sub Heading part two</a></li>
</ul>
</li>
<li>6 <a href="#toc6" title="Heading six">Heading six</a></li>
</ul>
</div>#toc1and the other #toc is the calling element. You can add or subtract as needed.
Step-3 Give an id to a specific point
Next, arrange the heading or destination points by including the same id as the table of contents. For example like this.<h2 id="toc1">Heading one</h2>
...texts in paragraph one
<h2 id="toc2">Heading two</h2>
...texts in paragraph two
<h2 id="toc3">Heading three</h2>
...texts in paragraph three
<h2 id="toc4">Heading four</h2>
...texts in paragraph four
<h2 id="toc5">Heading five</h2>
...texts in paragraph five
<h3 id="toc5_1">Sub Heading part one</h3>
...texts in paragraph part one
<h3 id="toc5_2">Sub Heading part two</h3>
...texts in paragraph part two
<h2 id="toc6">Heading six</h2>
...texts in paragraph six
Post a Comment
Post a Comment